Order a service
Order a service via main Add Services page
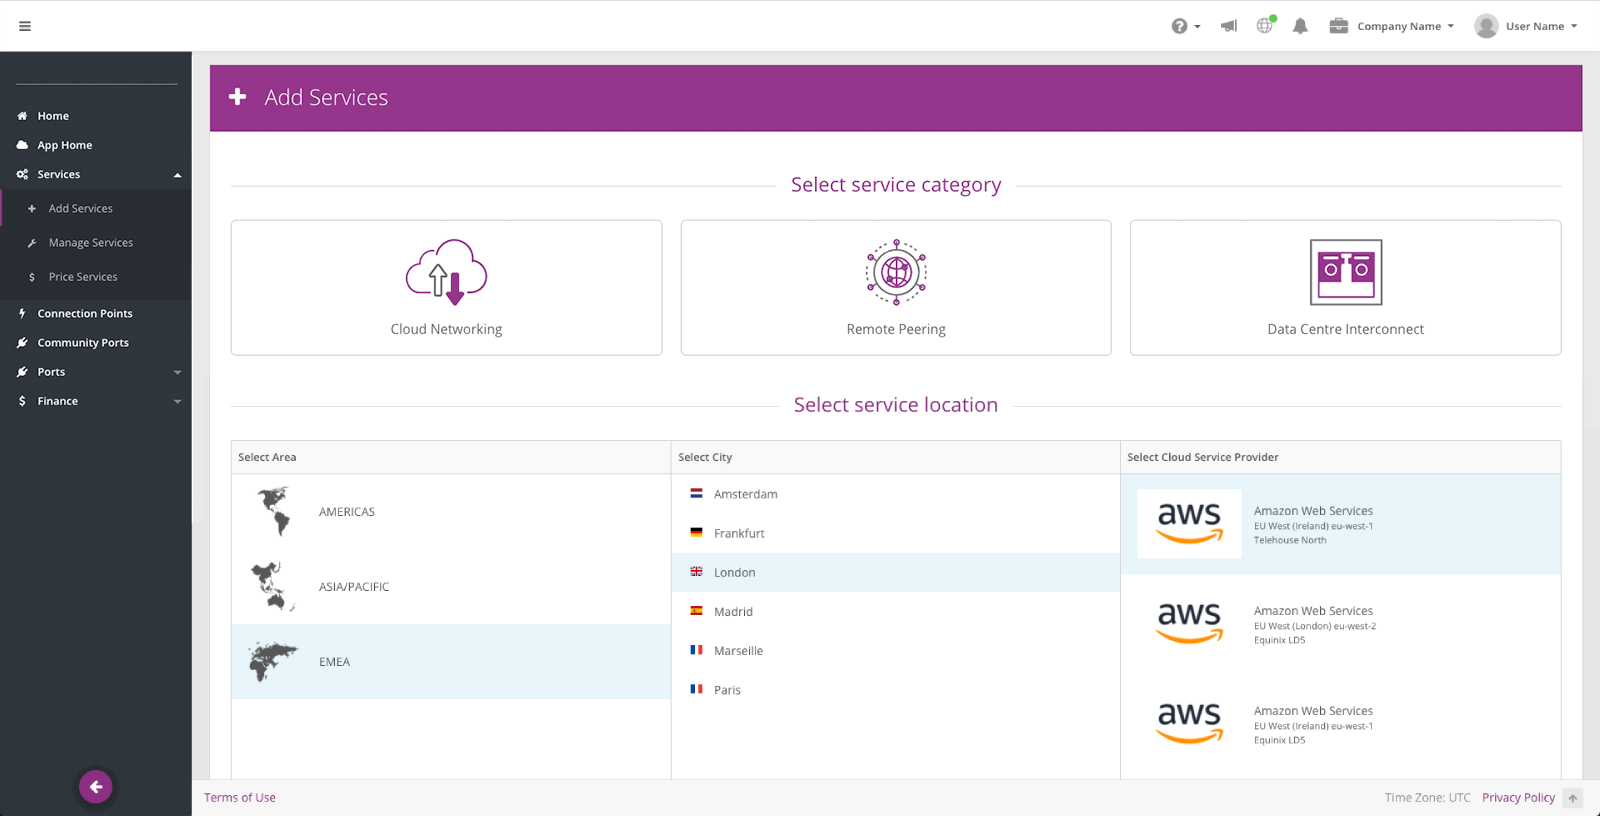
Networking services are ordered and provisioned via the main Add Services page. You can access this page by navigating to the Services menu in the side-bar of Networking.
From this page you will be able to choose within three main service categories:
After selecting a service category, you will then be prompted to select:
the two ends of your new service (which can either be two of your ports, or one of your ports and one of the available service ports)
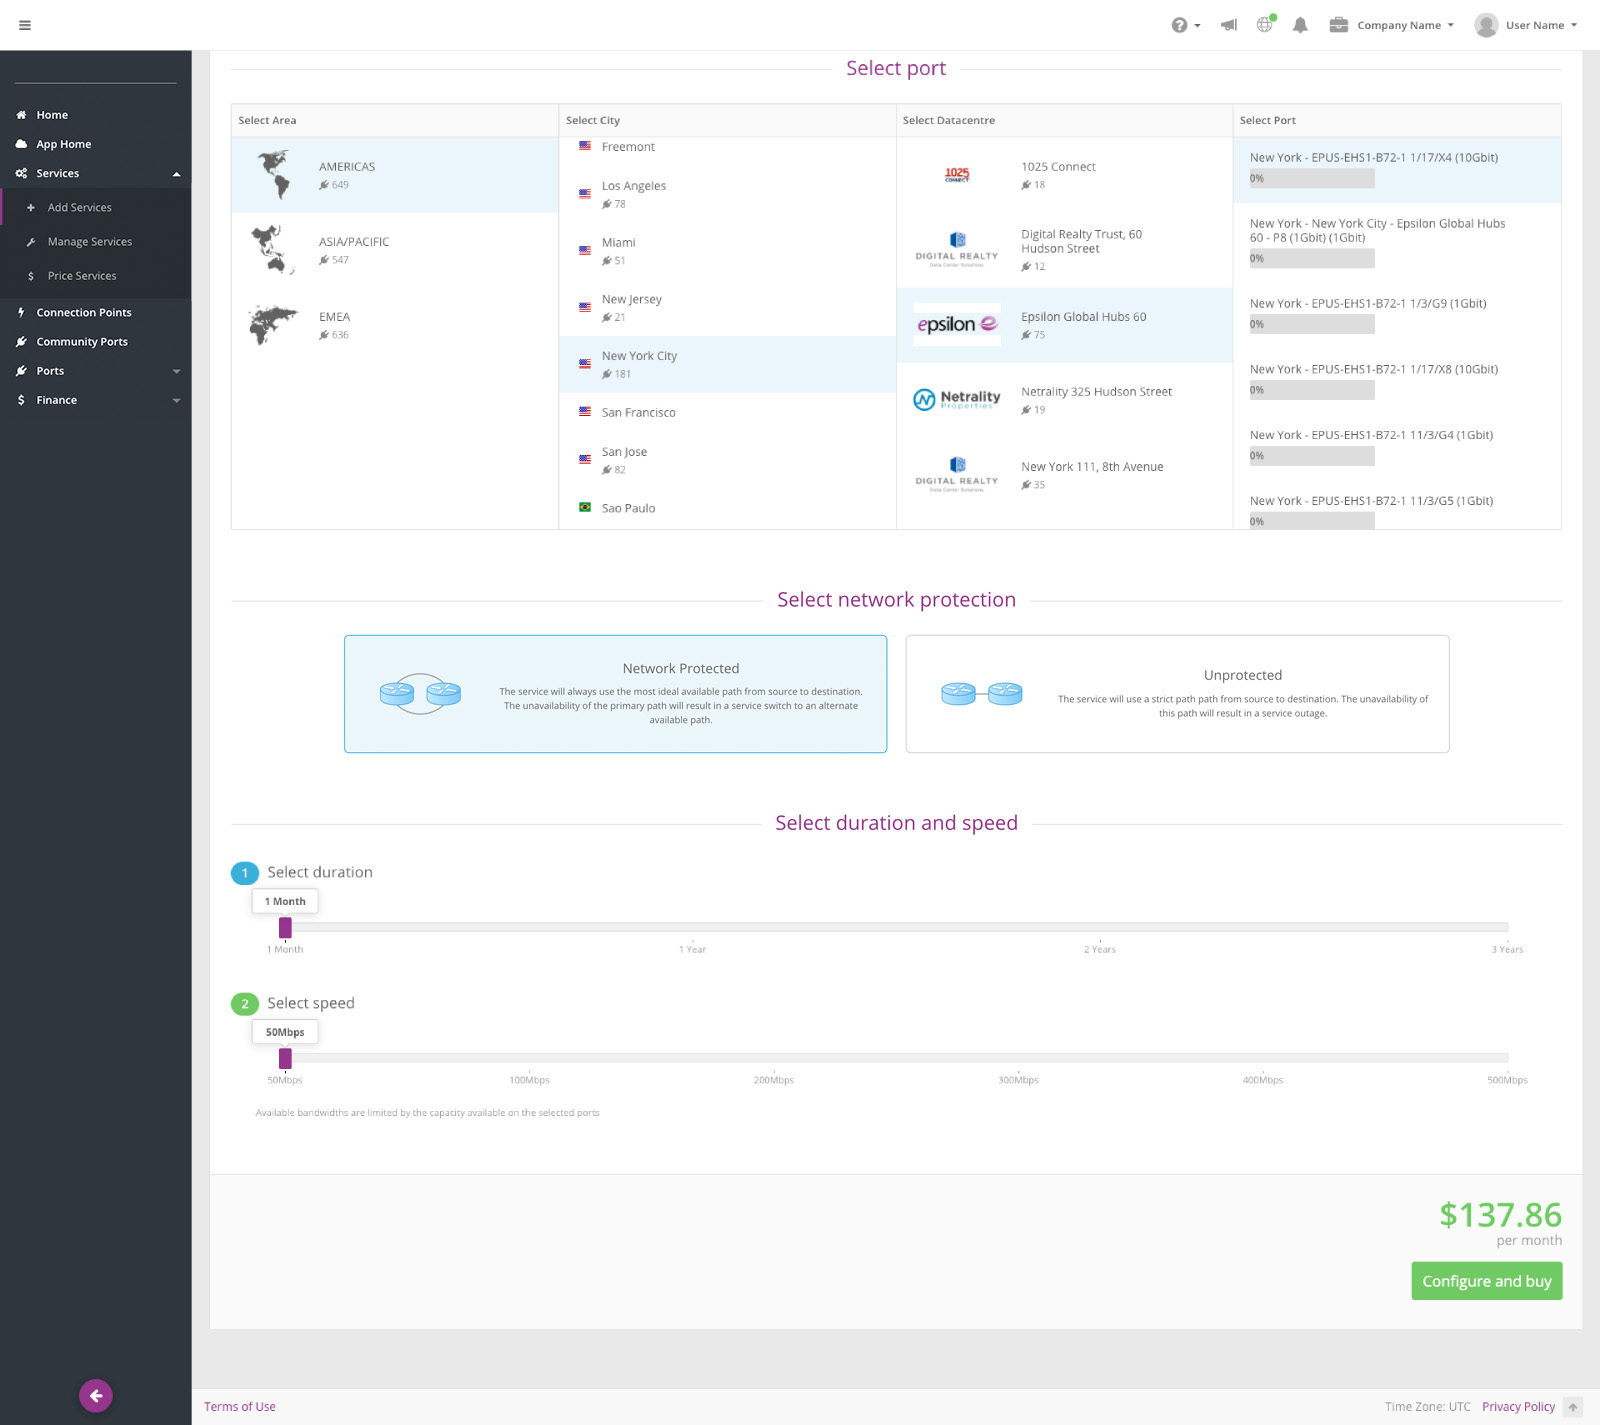
network protection
speed and contract duration
After these steps, you will be able to provide service specific configuration, confirm your order and initiate the service provisioning.
For more details on how to configure specific service categories, please see the dedicated sections available in this page.
Order a service via Connections Points page
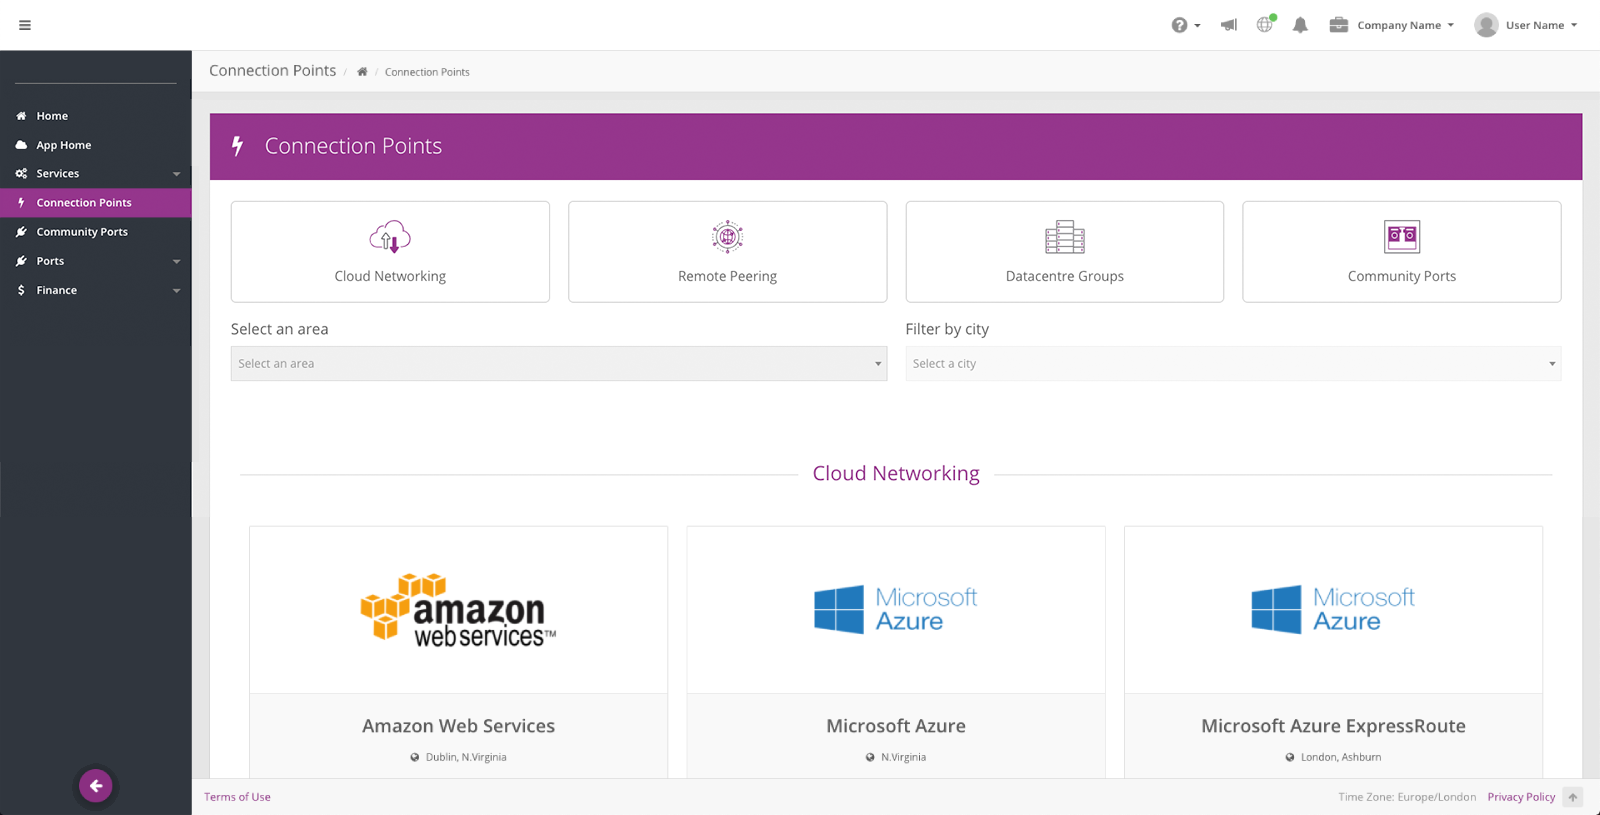
The Connection Points page provides an overview of all the different service providers available in Networking. If you are looking to connect to a Cloud Network, Remote Peer or a datacentre group, this page will help you in navigating our product offering.
The Connections Points page is accessible from the main Networking menu. From here you can select a connection point type and then look for the service you are interested in. Once you have made your selection, click on the Add service button and you will be redirected to the Add Services page where you can proceed with service ordering.
Order a service via Community Ports page
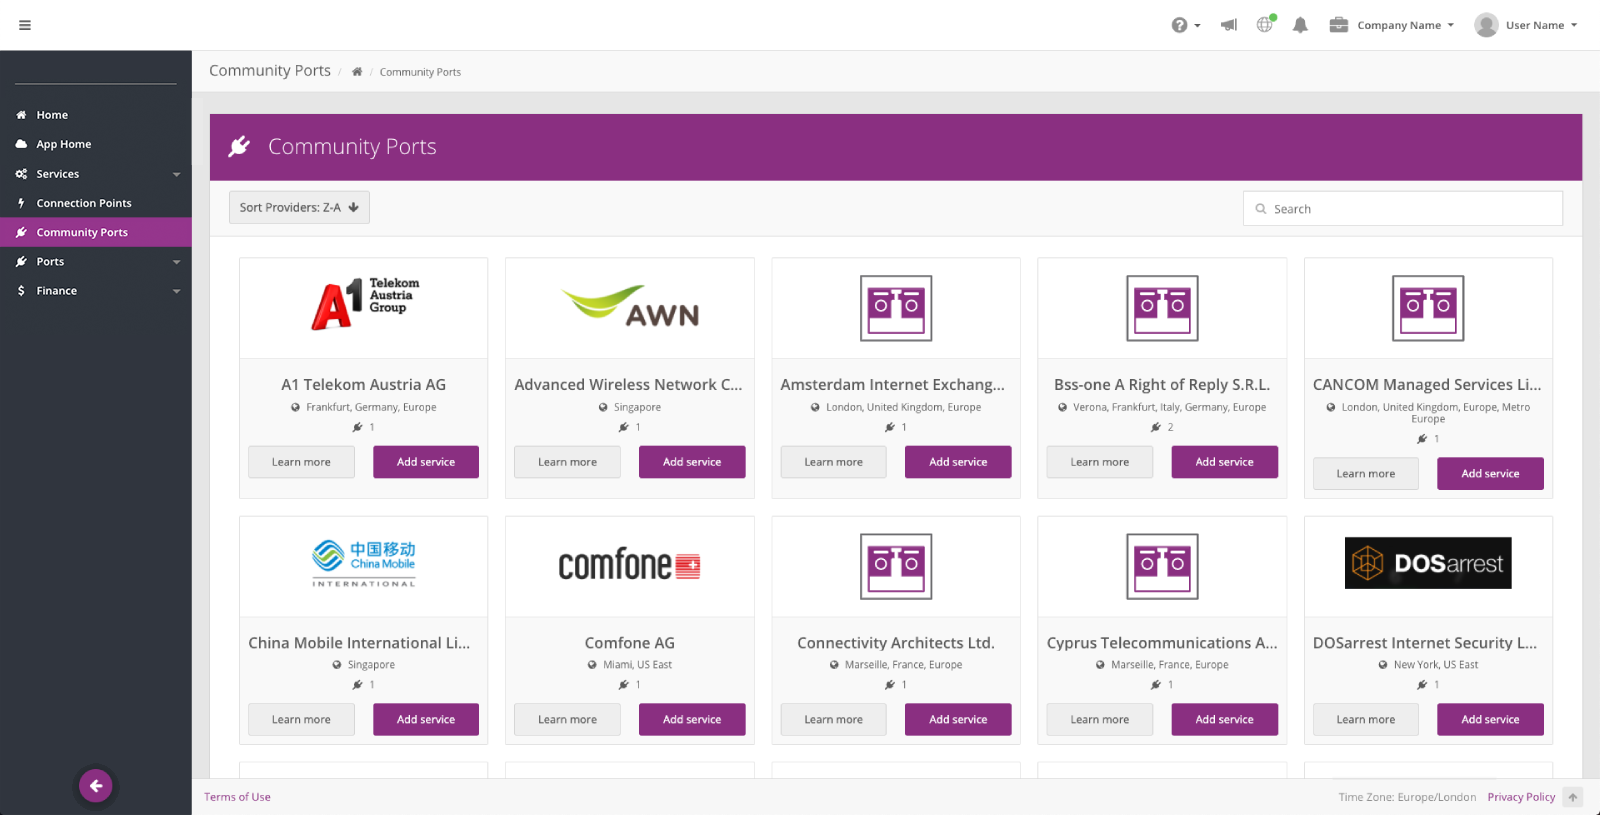
The Community Ports page, accessible from the main Networking menu, provides an overview of all the community ports available in the application.
If you are looking to connect to a community port (third-party customer connection), this page will help you in finding the one you are looking for. After you have identified the community port you wish to connect to, click on the Add service button and you will be redirected to the Add Services page , where you can complete the service ordering.
Cloud Networking
To connect to a Cloud Network from one of your ports, navigate to the Add Services page and select Cloud Networking as service category or select your chosen Cloud Network from the Connection Points page.
Next, select a service provider location by selecting an Area, City and Cloud Networking you want to connect within the ones available in the selected location.
After selecting the target Cloud Network, you can specify your port by selecting the Area, City, Datacentre and then choosing an available port.
Select whether you would like the service to be Network Protected or Unprotected. Network protected services will ensure the connection takes diverse routing and is protected against single points of failure.
Select the Duration and Speed of the service then click Configure and buy to proceed to the service details configuration.
In the New service details window you can confirm the cost, speed and duration of the service, these can be changed by selecting Cancel and altering your previous selections.
A Service Name is required and must be at least 5 characters. This name lets you identify your service throughout Infiny and can be edited in the Manage Services page once the service has been created.
Select a C-VLAN to use for the service from the ones that are available in the system. The C-VLAN must be unique on both your own port and the Cloud Networking port. The drop down list of available C-VLAN's will be prefiltered to only present available VLANS for selection.
Add the required additional configuration for your chosen Cloud Networking. Each Cloud Networking requires specific information, please consult the Cloud Networking's documentation for further information.
Once all required fields are completed, select Continue to confirmation,
Before completing the service order, check all details on the modal and select I agree to the Terms of Use, then select Buy. Once the service has been successfully provisioned, you will be given the option to Provision another service or View your service. The service can then be viewed in the Manage Services page.
Remote Peering
To connect to a Remote Peering from one of your ports, navigate to the Add Services page and select Remote Peering as service category or select your chosen Remote Peer from the Connection Points page.
Next, select a service provider location by selecting an Area, City and Remote Peering you want to connect to from those available in the selected location.
After selecting the target Remote Peering, you can specify your port by selecting the Area, City, Datacentre and then choosing an available port.
Select whether you would like the service to be Network Protected or Unprotected. Network protected services will ensure the connection takes diverse routing and is protected against single points of failure.
Select the Duration and Speed of the service then click Configure and buy to proceed to the service details configuration.
In the New service details window you can confirm the cost, speed and duration of the service, these can be changed by selecting Cancel and altering your previous selections.
A Service Name is required and must be at least 5 characters. This name lets you identify your service throughout Infiny and can be edited in the Manage Services’ page once the service has been created.
Select a C-VLAN to use for the service from the ones that are available in the system. The C-VLAN must be unique on both your own port and the Remote Peer one. The drop down list of available C-VLAN's will be prefiltered to only present available VLANS for selection.
Add the required information for your chosen Remote Peer, the optional fields can be left blank if you do not have the information.
Once all required fields are completed, select Continue to confirmation
Before completing the service order, check all details on the modal and select I agree to the Terms of Use, then select Buy. Once the service has been successfully provisioned, you will be given the option to Provision another service or View your service. The service can then be viewed in the Manage Services page.
Data Centre Interconnect
To create a new Data Centre Interconnect service, navigate to the Add Services page and select Data Centre Interconnect as the service category. Alternatively, this category will be preselected if you land on the Add Services page from either of the Connection Points or Community Ports pages.
Next, specify the two ports to connect between between using the selection of Area, City, Datacentre and then choosing an available port within those displayed.
Select whether you would like the service to be Network Protected or Unprotected. Network protected services will ensure the connection takes diverse routing and is protected against single points of failure.
Select the Duration and Speed of the service then click Configure and buy to proceed to the service details configuration.
In the New service details window you can confirm the cost, speed and duration of the service. These can be changed by selecting Cancel and altering your previous selections.
A Service Name is required and must be at least 5 characters. This name lets you identify your service throughout Infiny and can be edited in the Manage Services’ page once the service has been created.
Select C-VLAN type. Depending on the C-VLAN type you have selected, you will be asked to choose the layer 2 VLAN configuration. The available options vary by equipment type and in some situations not all will be available. The C-VLAN lists are filtered by available C-VLANs and must be unique. If you select an untagged service (EPLINE / Virtual Untagged) – then this must be the only service on the port. If there are services already provisioned on the port(s) these options will not be presented as available options.
Once all required fields are completed, select Continue to confirmation
Before completing the service order, check all details on the modal and select I agree to the Terms of Use, then select Buy. Once the service has been successfully provisioned, you will be given the option to Provision another service or View your service. The service can then be viewed in the Manage Services page.